Create Your First Test Plan in a Few Simple Steps
The system uses a wizard-style approach to guide test engineers in creating compliant test plans. A new test plan can be created in just a few simple steps.
Step 1: Ensure Correct Sample Connection
- According to the test requirements, prepare the necessary instruments, equipment, and test samples.
- Correctly connect the test samples to the instruments and equipment.
Step 2: Start the Equipment, Check Instrument IP
Correctly start the equipment and check the instrument IP.
💡 How to check the IP address of each instrument? View Instrument IP Addresses
Step 3: Set Up Test Instruments
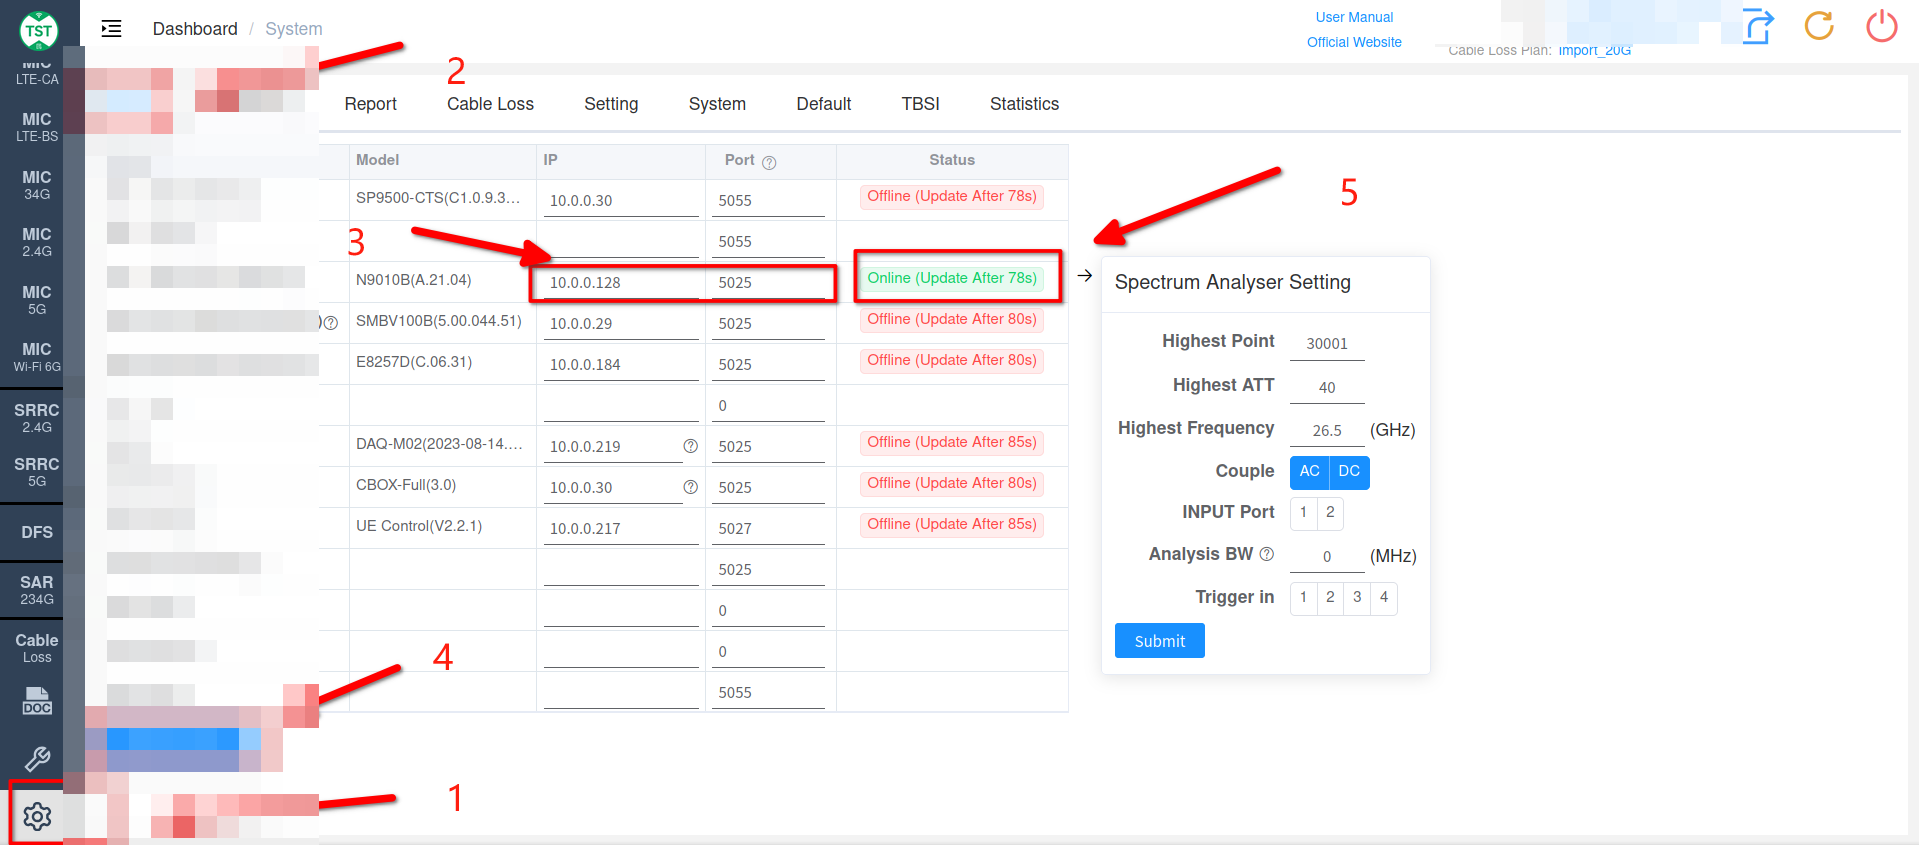
After confirming the device IP, correctly enter the device IP into the Device interface of the settings screen.
- First, find Settings.
- Test instrument settings are located in the Device interface of the Settings screen.
- Enter the IP in the boxed area (the image shows a spectrum analyzer as an example, IP is 10.0.0.128:5025).
- After entering the IP, you need to click Update & Check to save the settings.
- After completing the above operations, when the device is online, the boxed area should display Online and be green. If the device is offline, it will display Offline and be red. (If the device is powered on but still shows Offline, first refresh the browser. If it still shows Offline after refreshing, please check if the device IP is entered correctly.)
💡 Want to learn more about setting up test instruments? Set Up Test Instruments
Step 4: Select Test Standard
Here, we take CE 5G (EN 301893 V2.1.1) as an example to create a new test plan.
In actual testing, you need to select the corresponding test standard based on specific test requirements and product characteristics.
💡 How to select product characteristics to create a test plan? Create Test Plan
Step 5: Create a New Project (New Project)
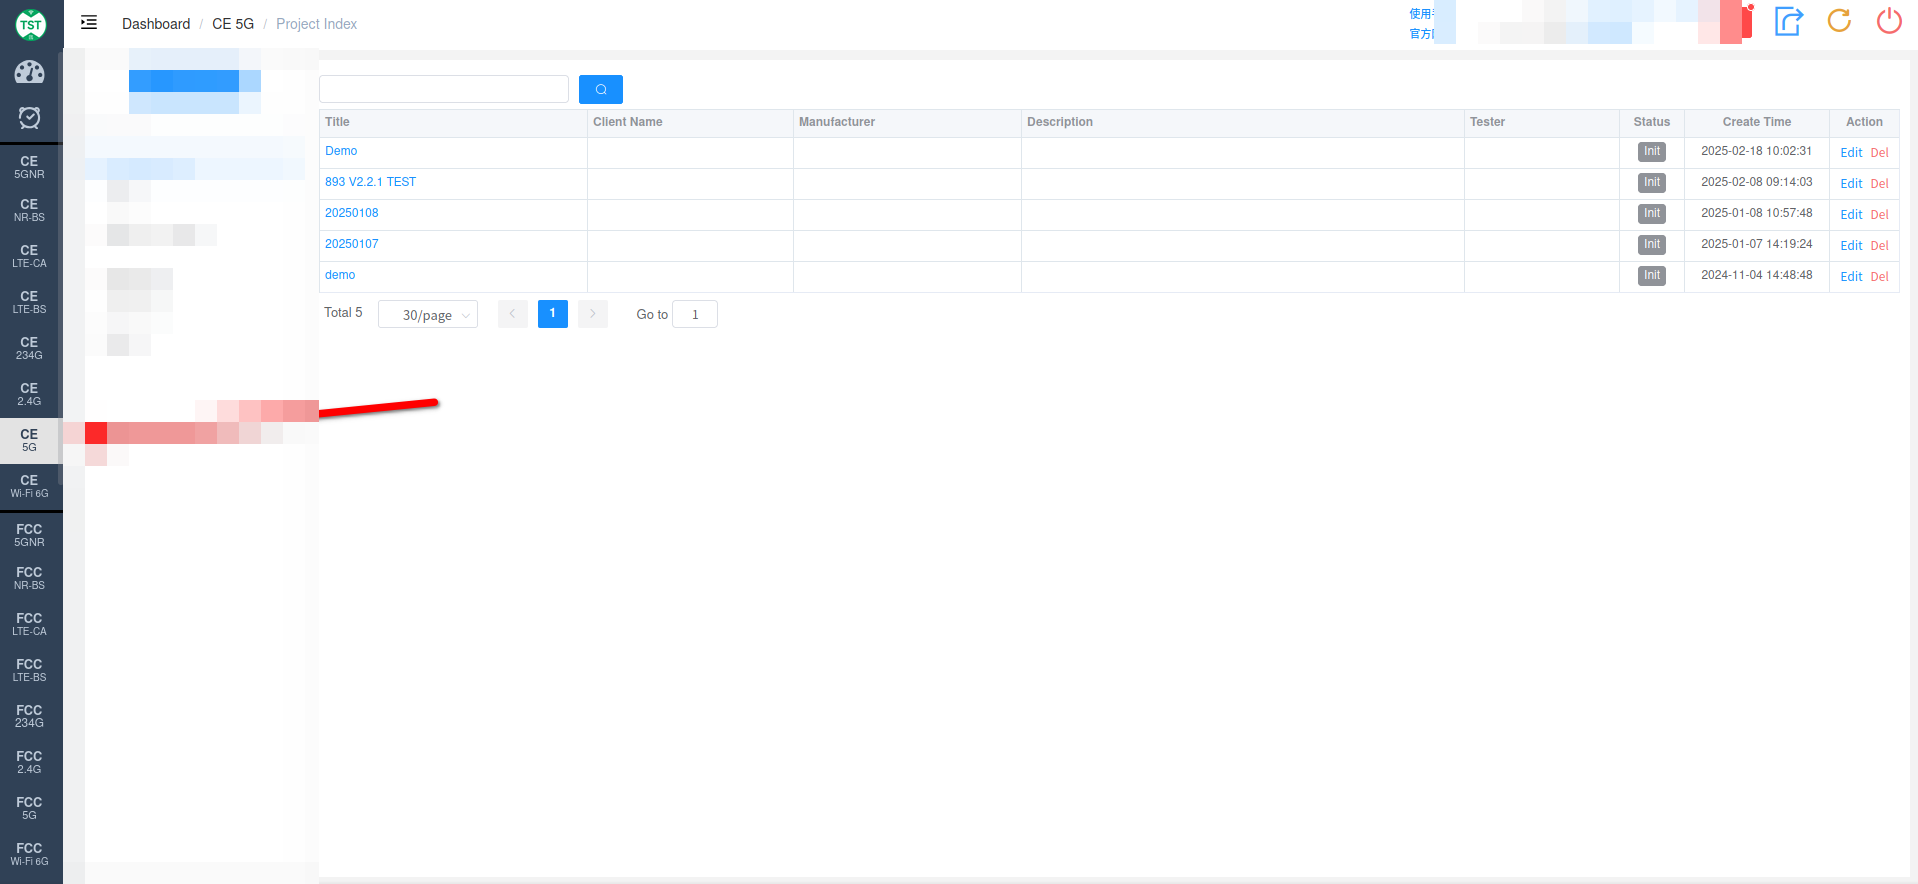
After selecting the corresponding test standard, you need to first create a Project (here, CE 5G (EN 301893 V2.1.1) is used as an example).
- Click + CE 5G Project.
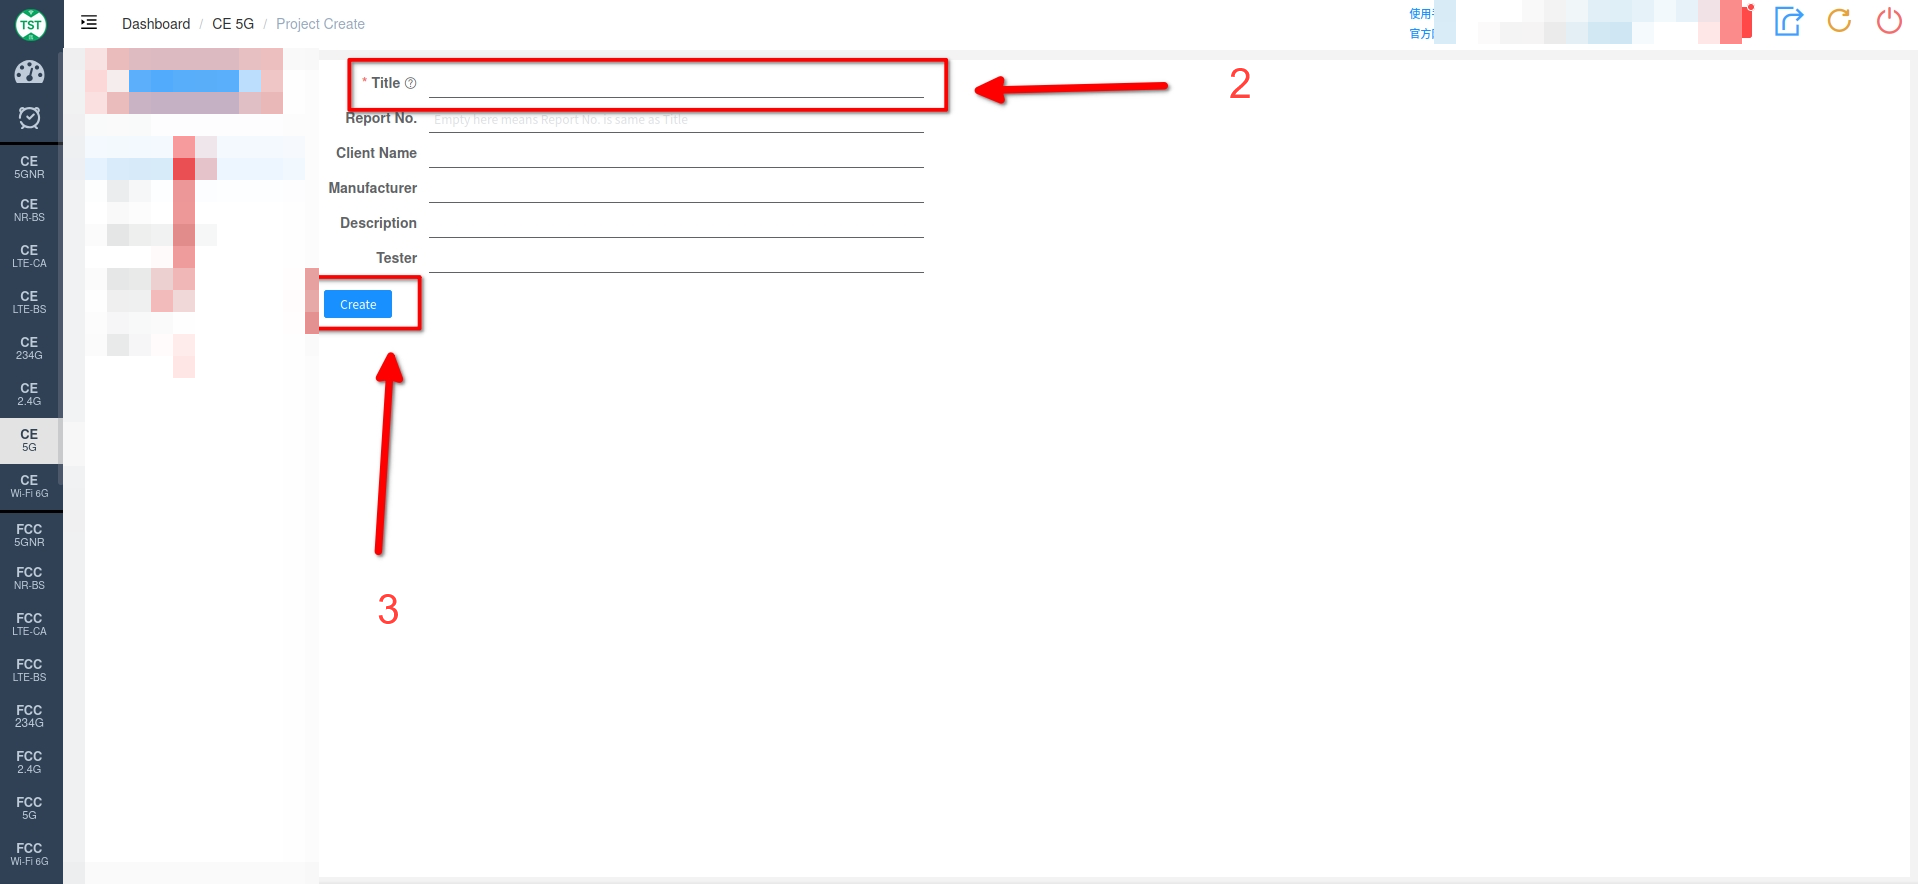
- Enter the test Project name in the Title field (both Chinese and English are supported).
- Click Create or enter the Title and press Enter to complete Project creation.
Step 6: Create a New Test Plan (New Plan)
A created Project is like a folder. We need to place "files", which are our actual test Plans, in this "folder". Multiple Plans can be created under one Project, and Plan names can be duplicated.
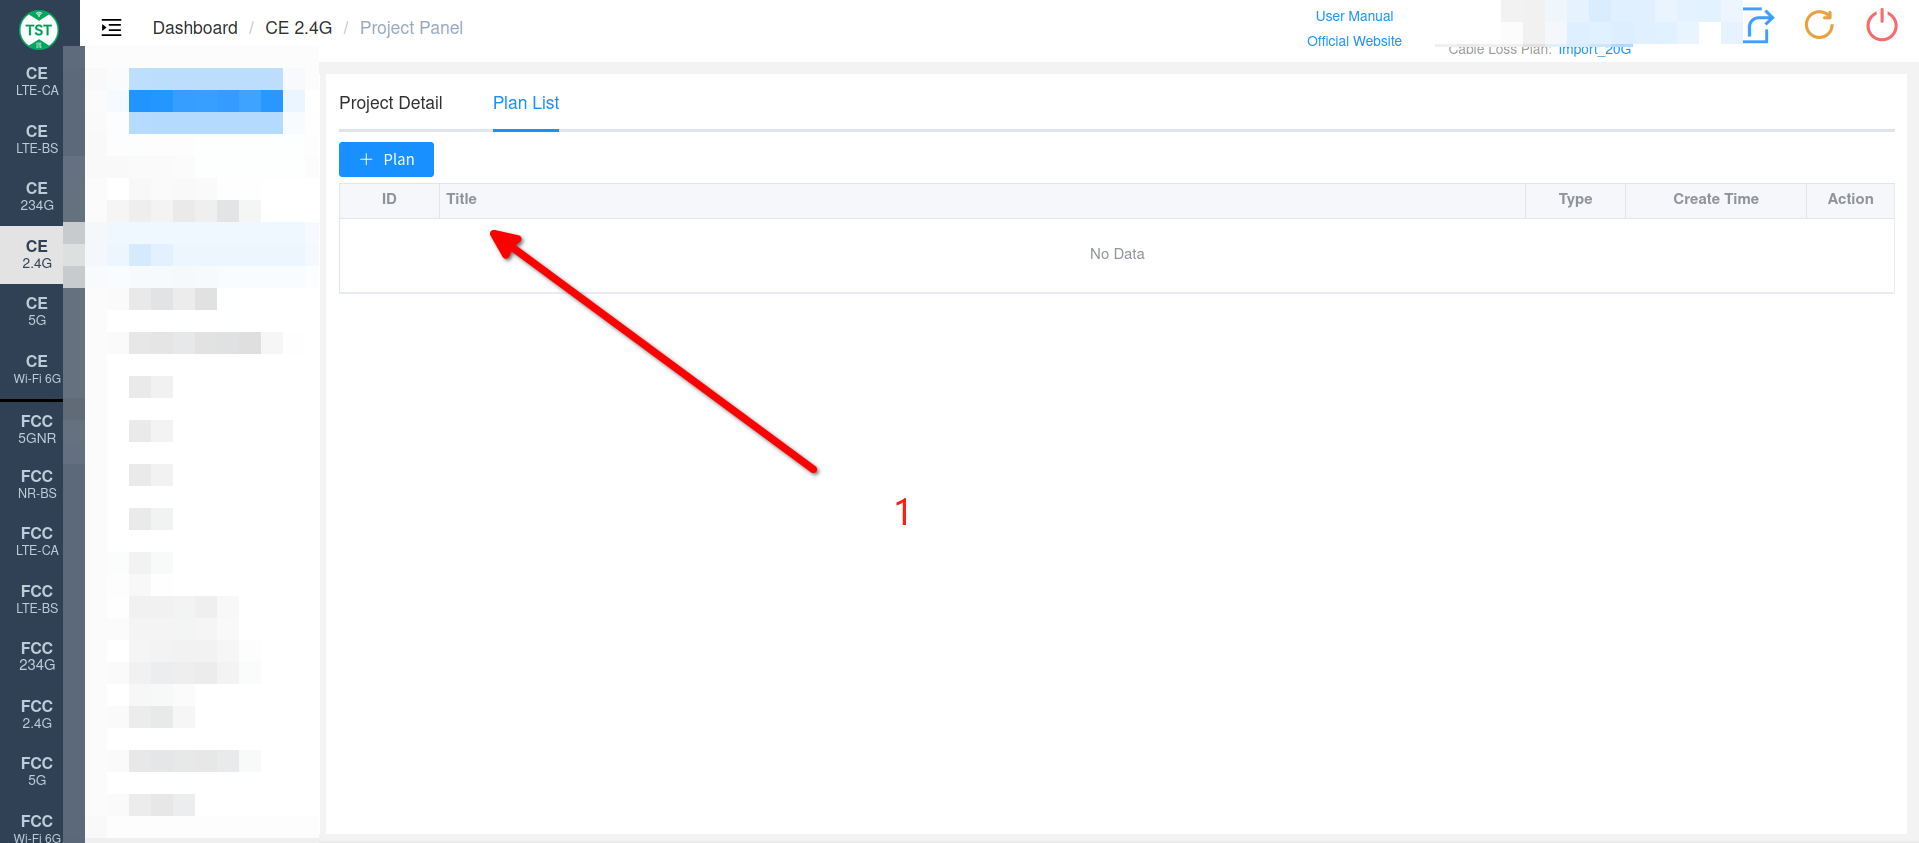
- Under the created Project, select Plan List (you will be automatically redirected here after creating a Project in Step 5).
- Click + Plan (this will automatically take you to Step 7).
Step 7: Select Product Characteristics, Complete Test Plan Creation
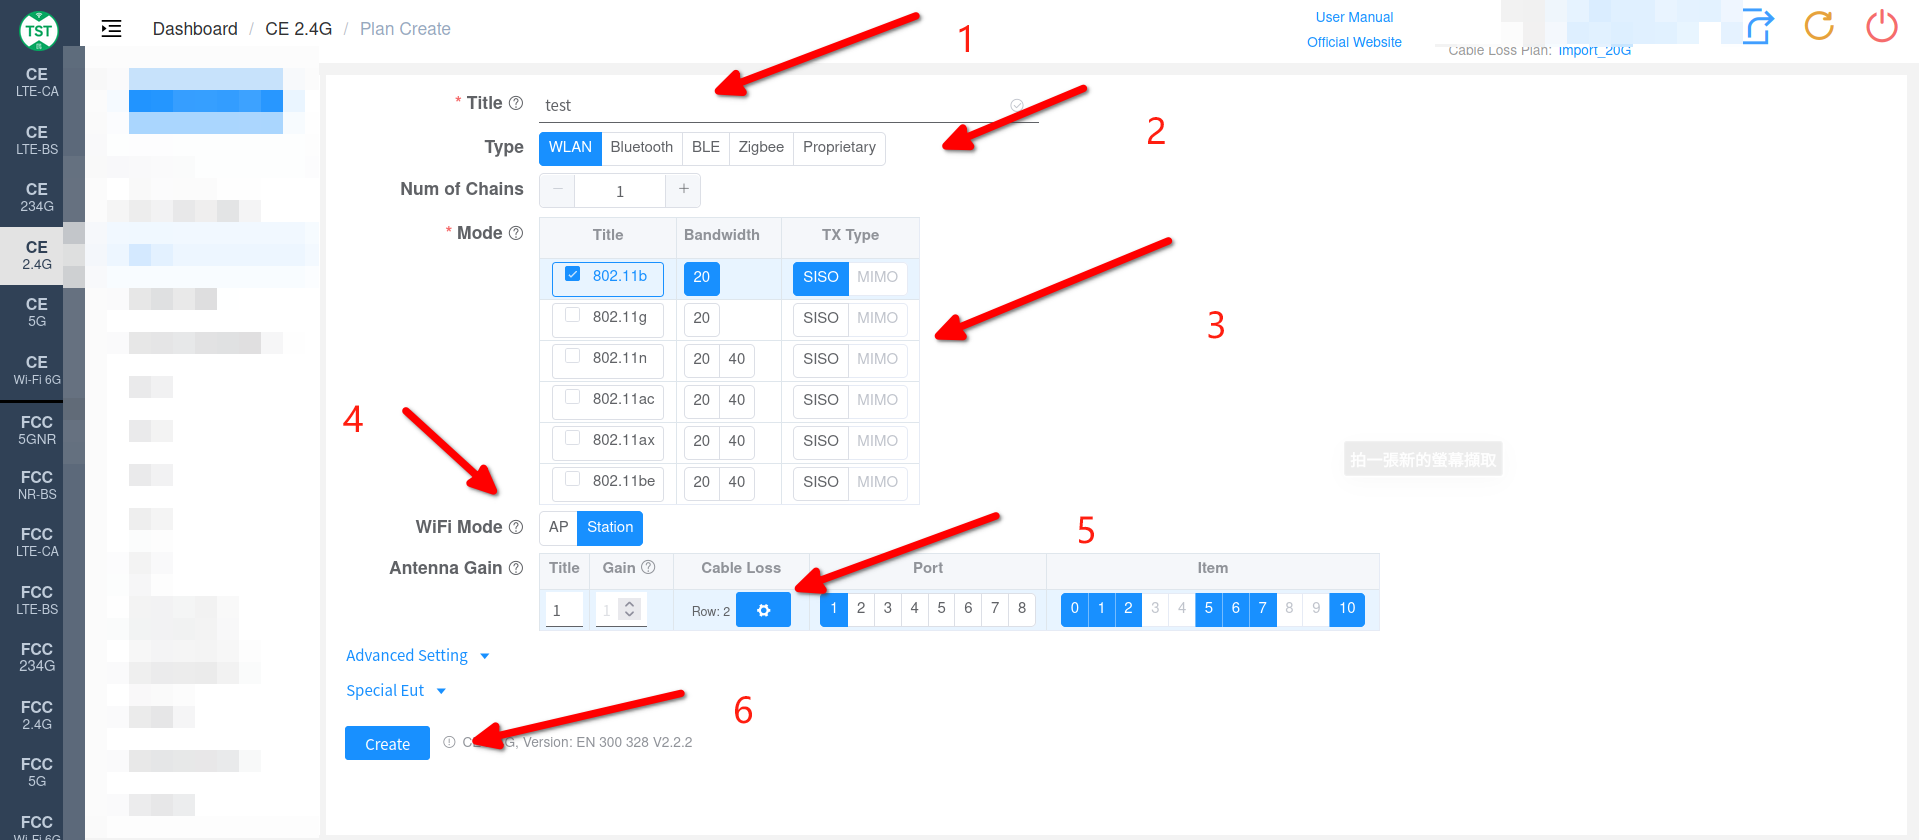
- Enter the test Plan name in the Title field (both Chinese and English are supported).
- Select the corresponding test Type based on test requirements and product characteristics.
- Select the corresponding test Mode (multiple selections allowed) based on test requirements and product characteristics.
- Select the corresponding WIFI Mode based on test requirements and product characteristics.
- Select Cable Loss based on test requirements.
- Click Create to complete the test Plan creation (you will be automatically redirected to Step 8 upon completion).
💡 How to create Cable Loss? Create Cable Loss
Step 8: Select Corresponding Items for Testing
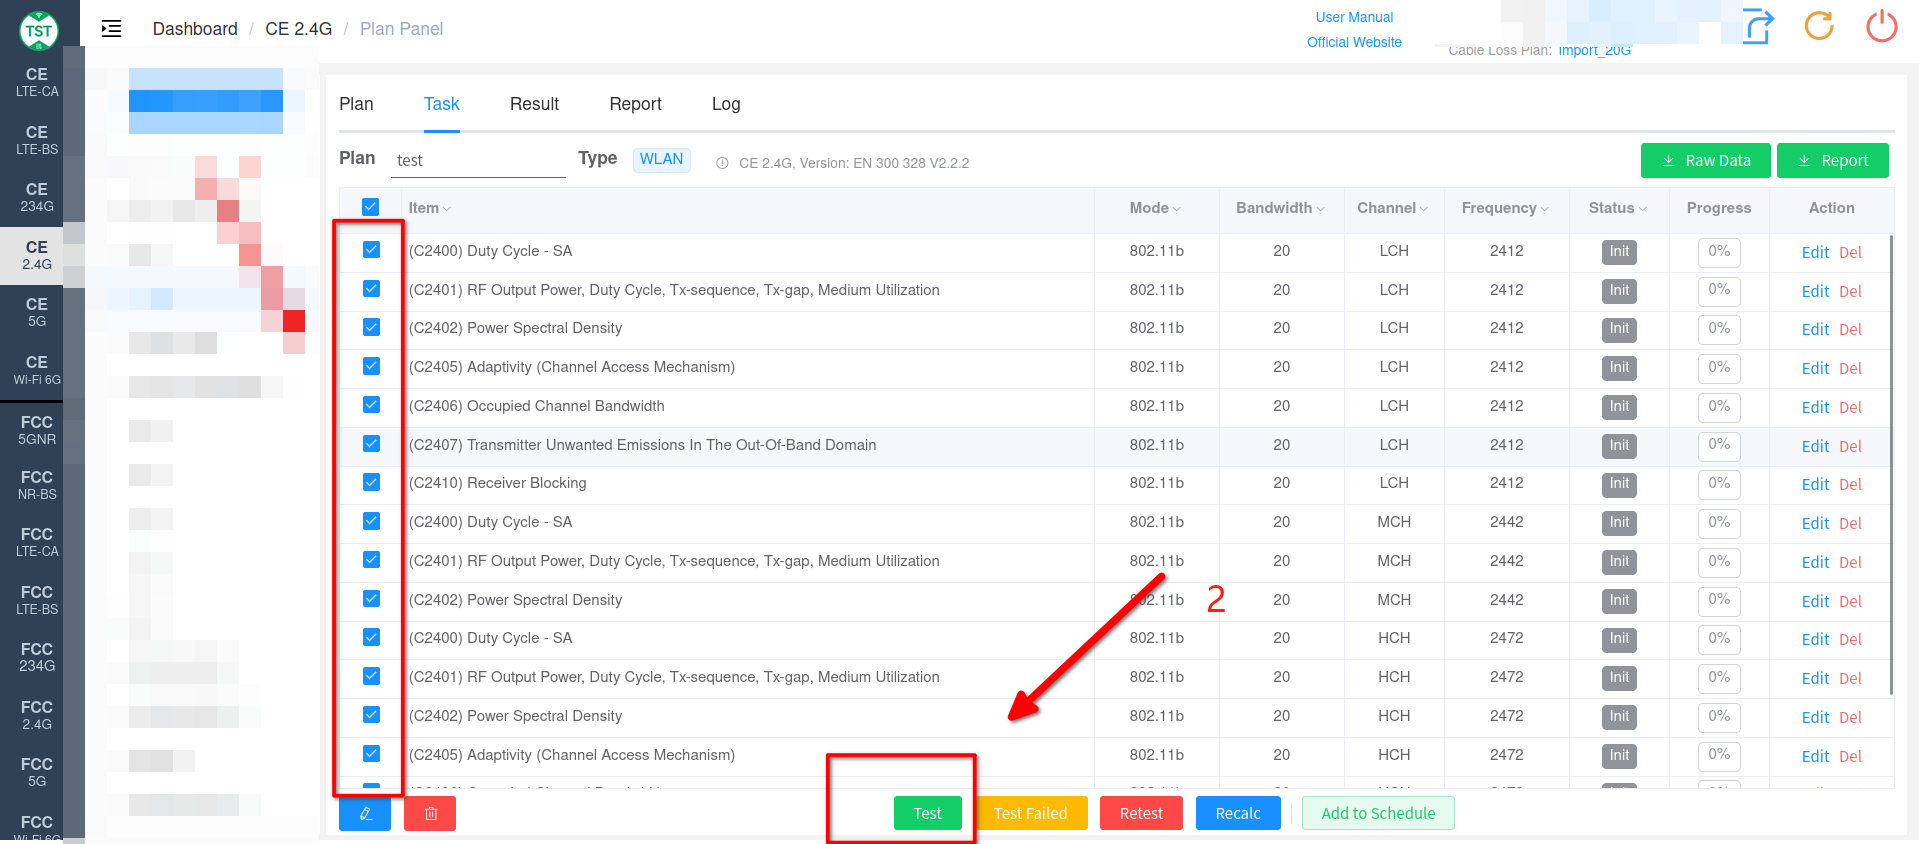
- On the Task page, check the box to the right of an Item to select it for testing (click the checkbox in the Item header to select or deselect all Items).
- Click Test to start testing (this will automatically take you to the test page in Step 9).
Step 9: Start Testing
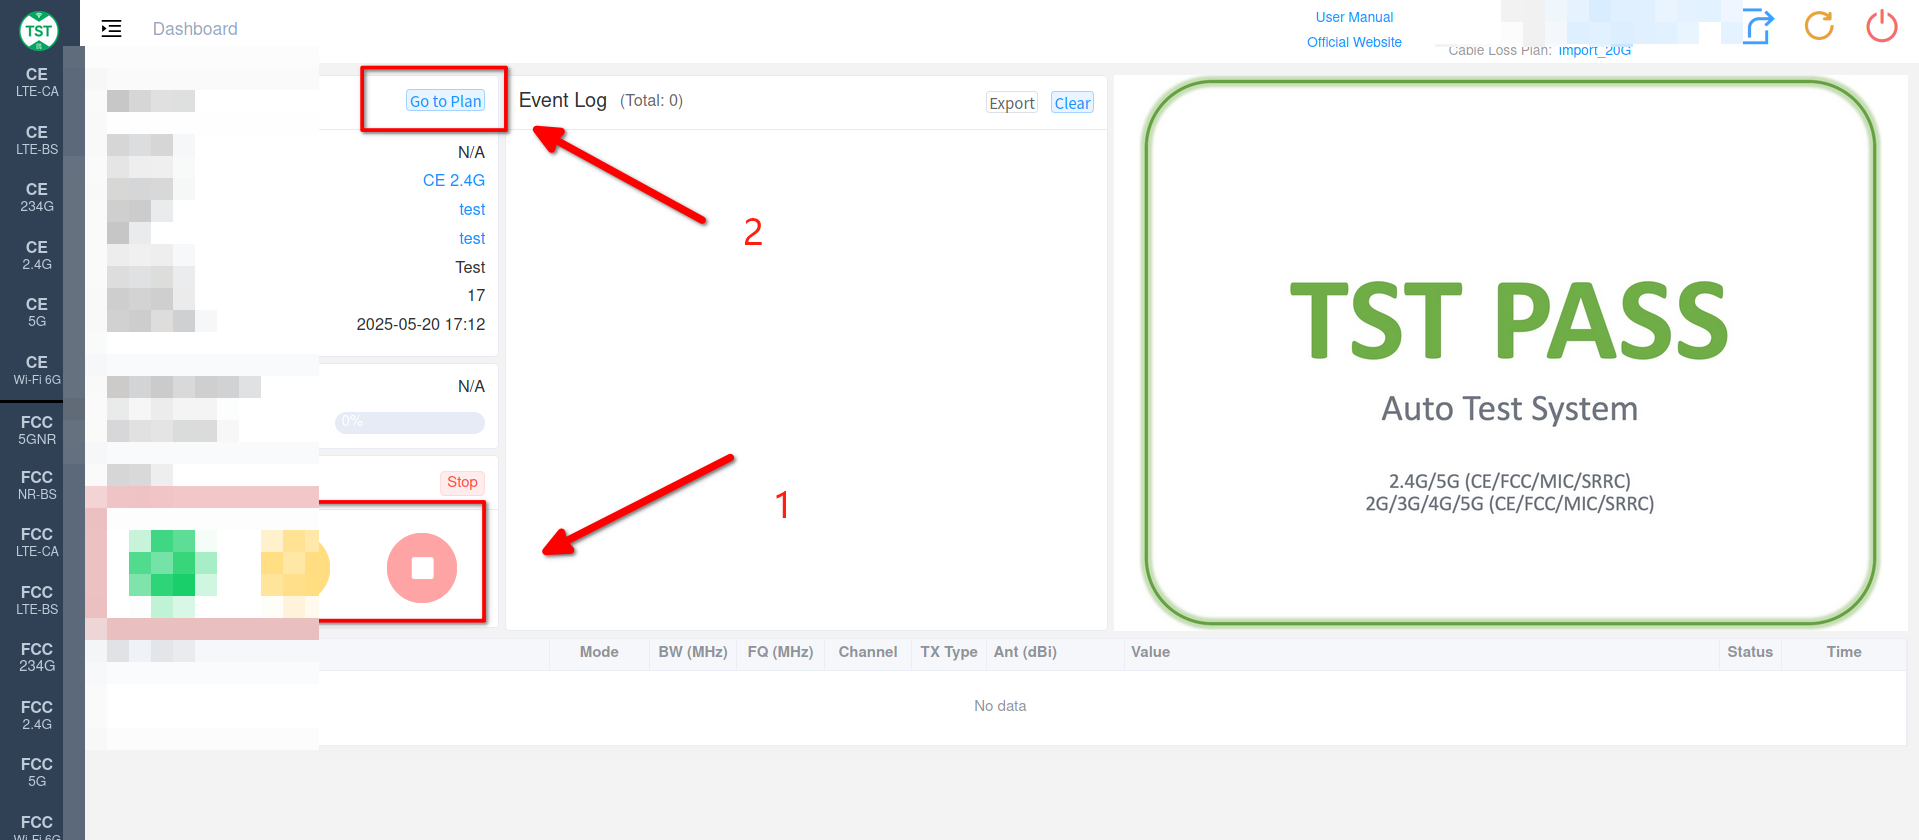
- Click the green start button to begin testing, the yellow button to pause testing, and the red button to stop testing.
- Click Go to Plan to return to the Task page (Step 8) for settings (if you need to modify Plan settings, you must pause the test first).
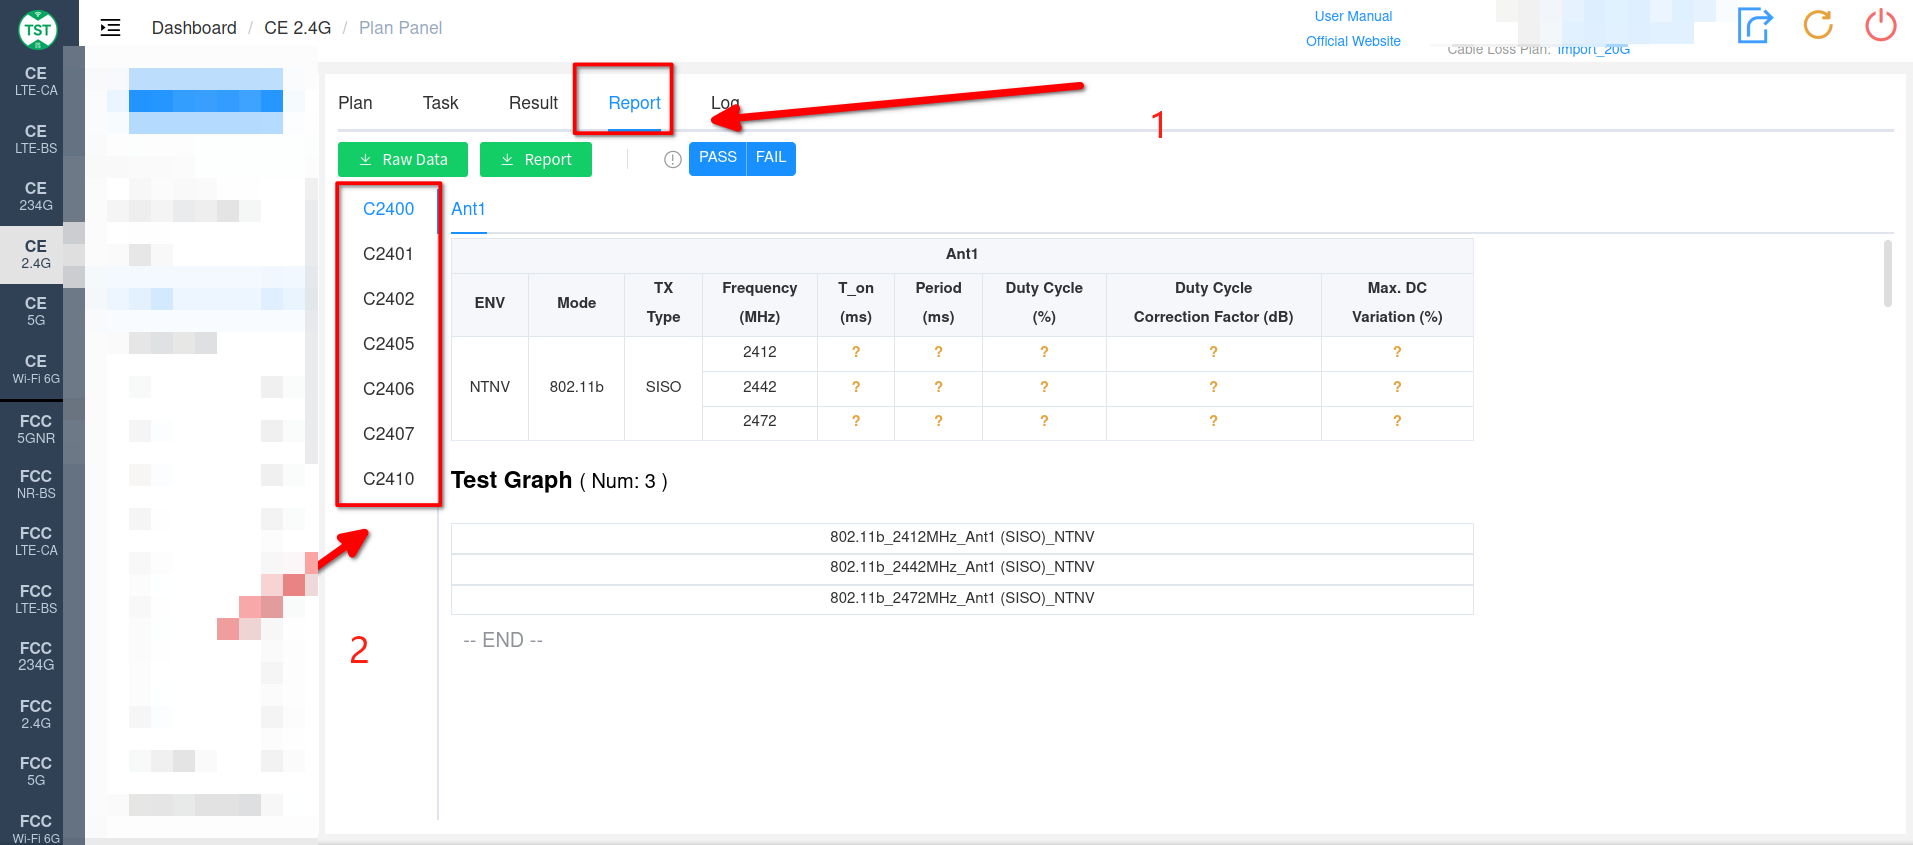
Step 9: Preview Report After Testing is Complete
- After the test is complete, you can follow Step 8, sub-step 2 (click Go to Plan) to return to the Plan settings page. Select Report to preview the report data.
- On the right side of the report preview page, you can select the Items to preview.
Step 10: Export Test Report
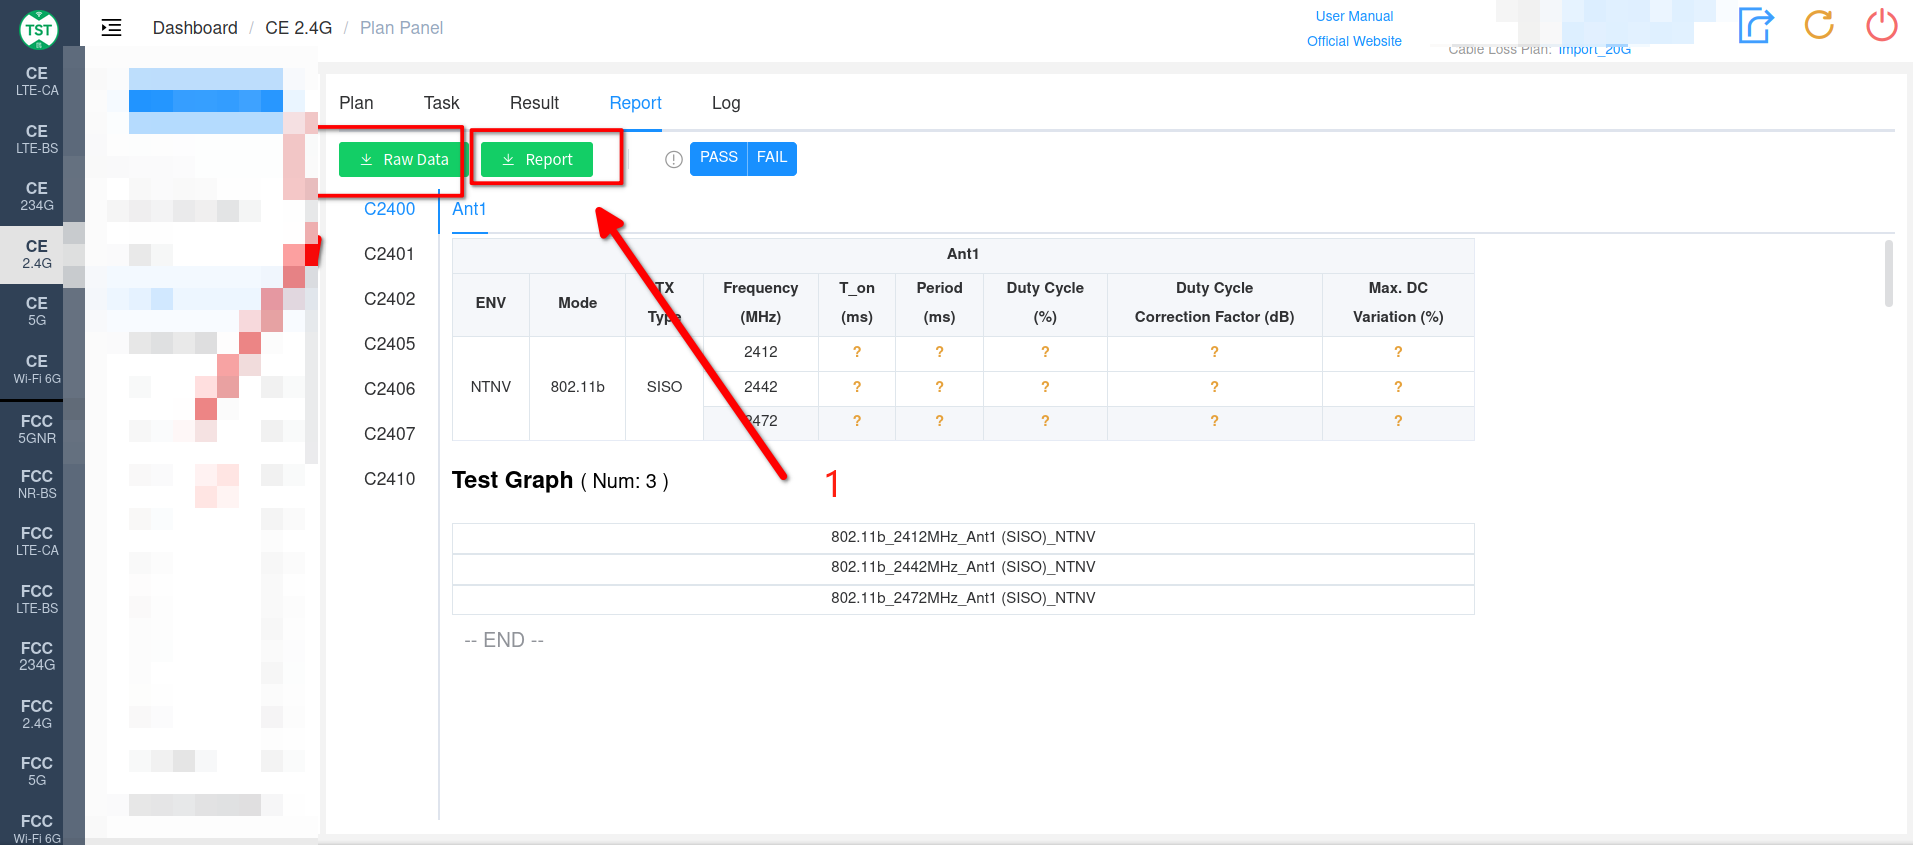
- In the Report section, click Report to export the report (you will be automatically redirected to the report download interface).
- In the Report section, click Raw Data to export the Plan's raw data.
Step 11: Download Report
After the report export is complete, click the blue download button to download the report.
💡 Want to learn more about specific report operations? You can check Report Center