Pass System Schedule Test
Plan Settings
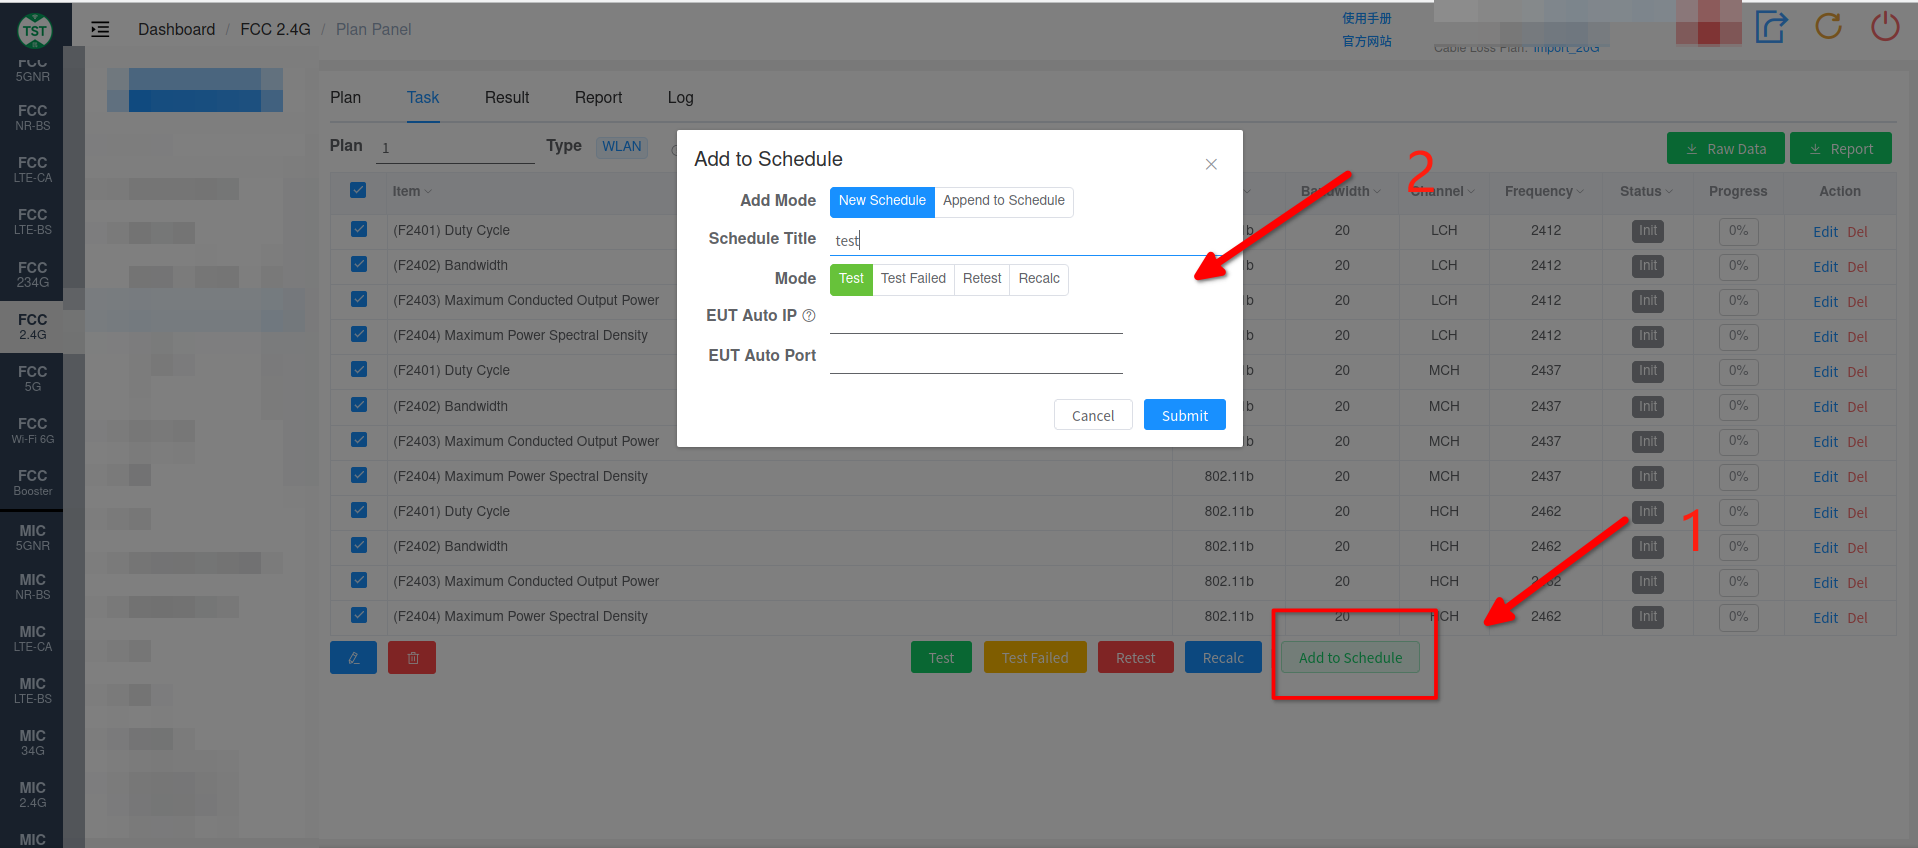
On the Plan Task page that needs to be added to the schedule test, click Add to Schedule
In the pop-up Add to Schedule window, select the corresponding Add Mode
New Schedule: Create a new queue
Append to Schedule: Add the Plan to an existing queue
- Select the Plan's test Mode, and fill in the EUT Auto IP and EUT Auto Port for automatic fixed-frequency (corresponding to the IP and Port set in the Host card on the Dashboard page of the EUT Auto software, see Automatic Fixed-Frequency Test).
Queue Test
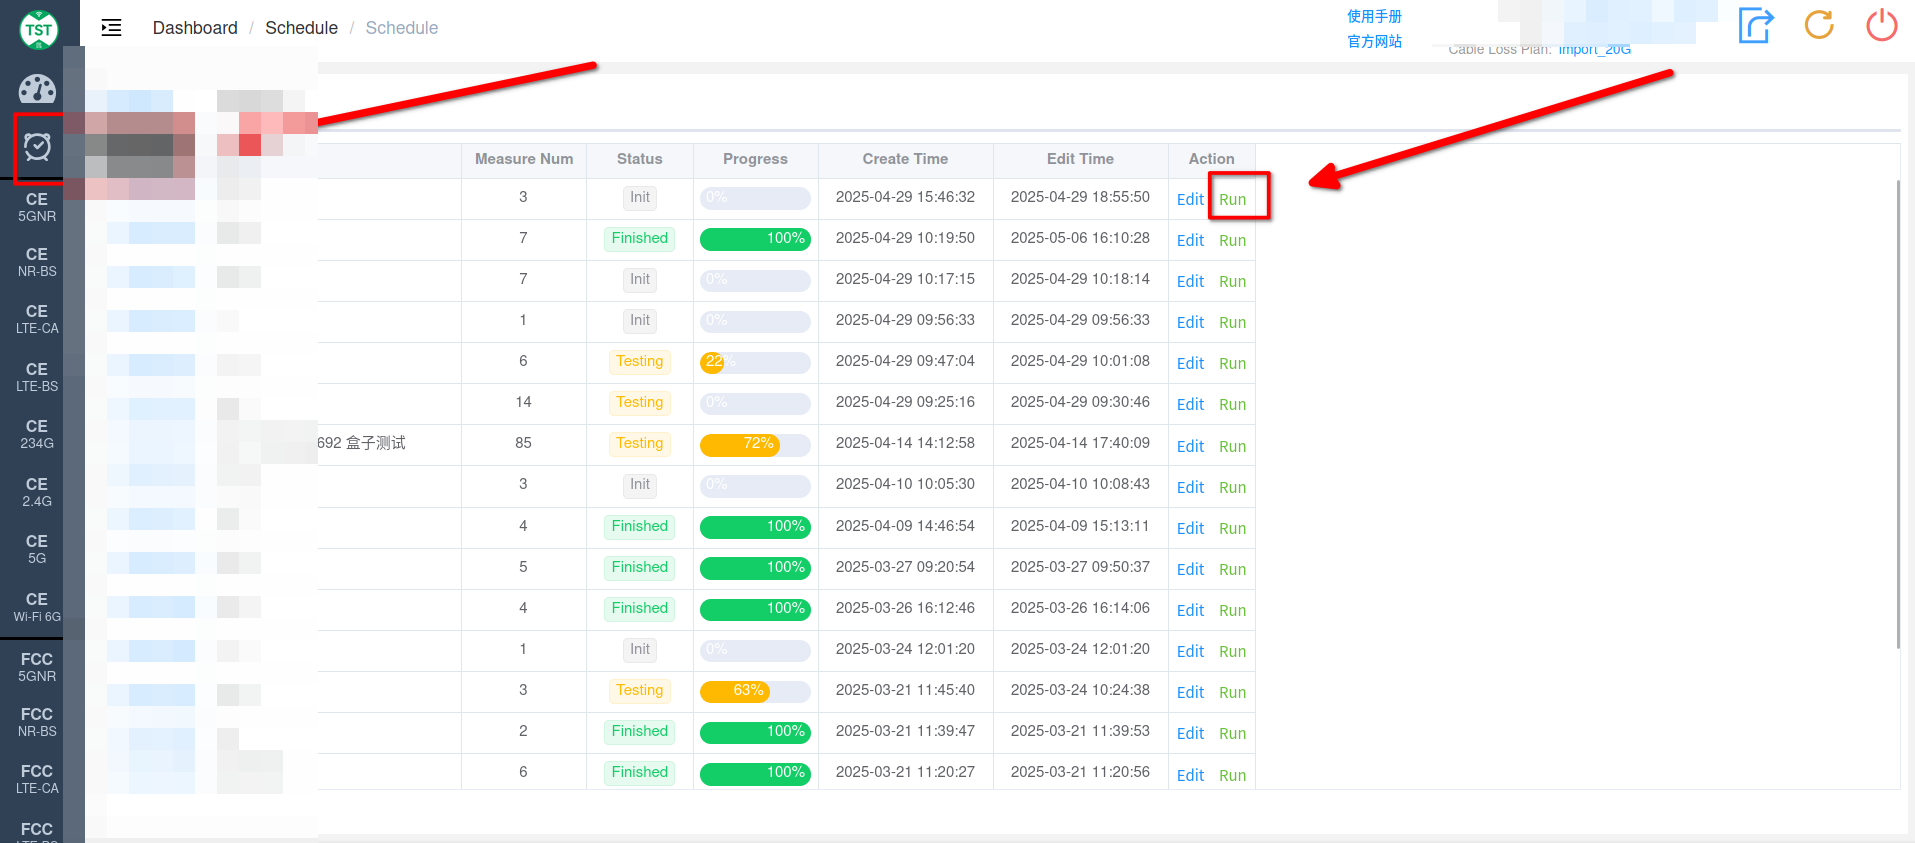
Find the Schedule dashboard in the sidebar. In the Schedule dashboard section, select the corresponding test queue, click the Run button as indicated in the figure, and it will automatically jump to the Edit Schedule page.
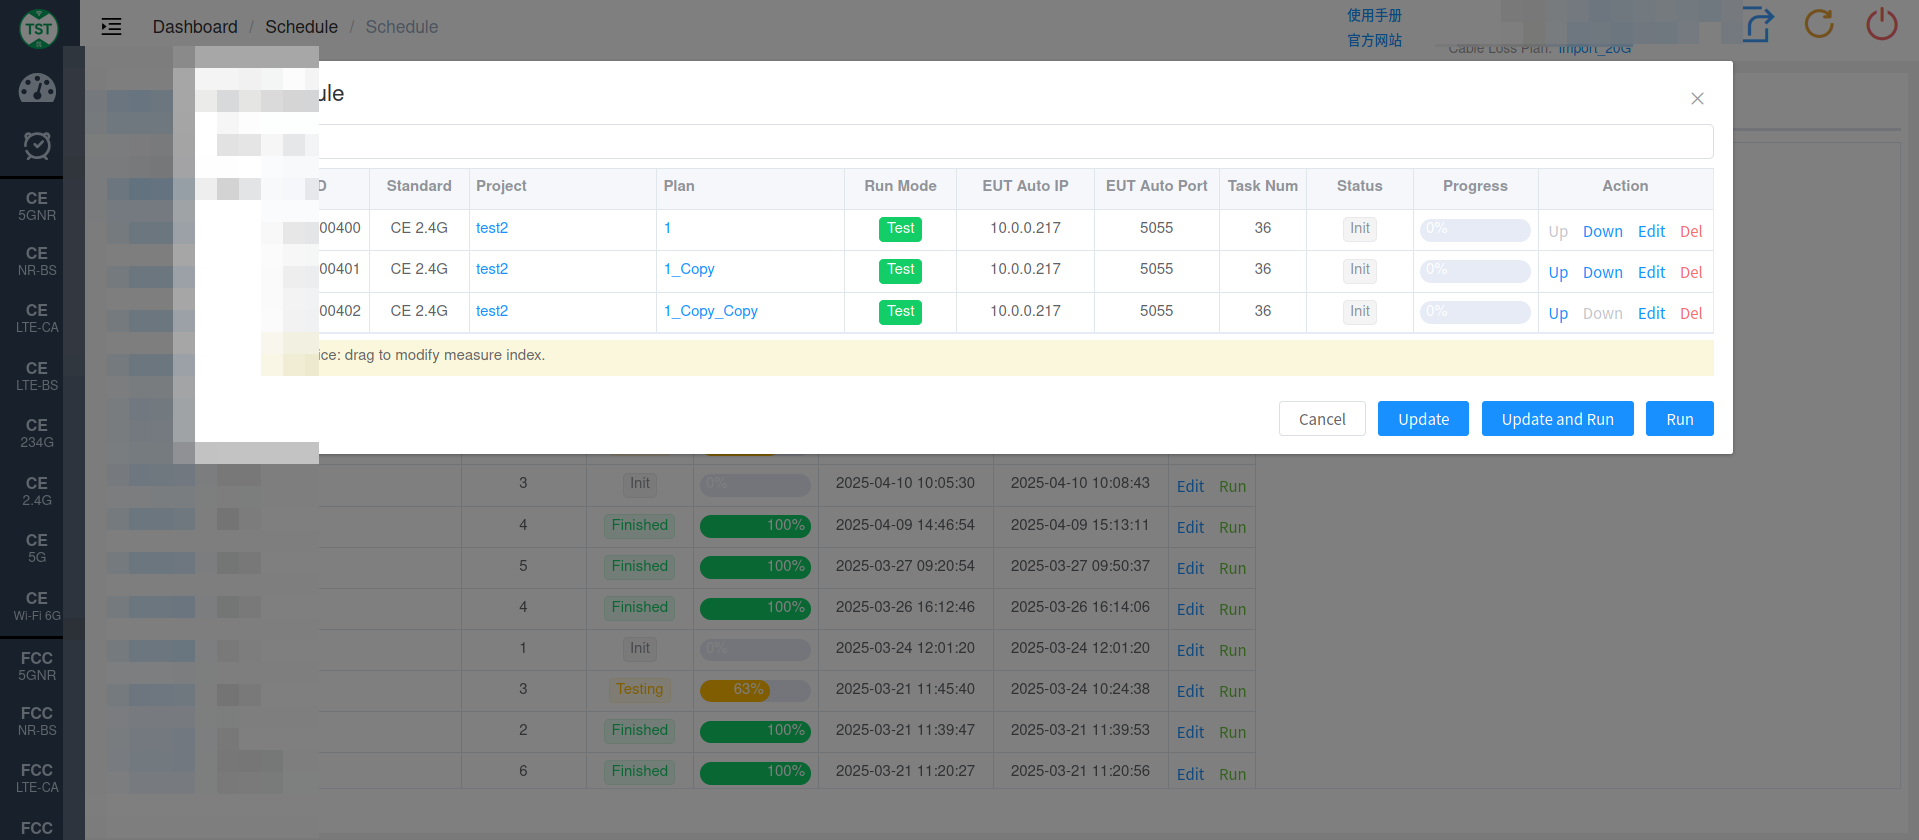
Update: Update the edited queue
Update and Run: Update the edited queue and run the test
Run: Start the test; the queue test will automatically run according to the plan order within the queue.
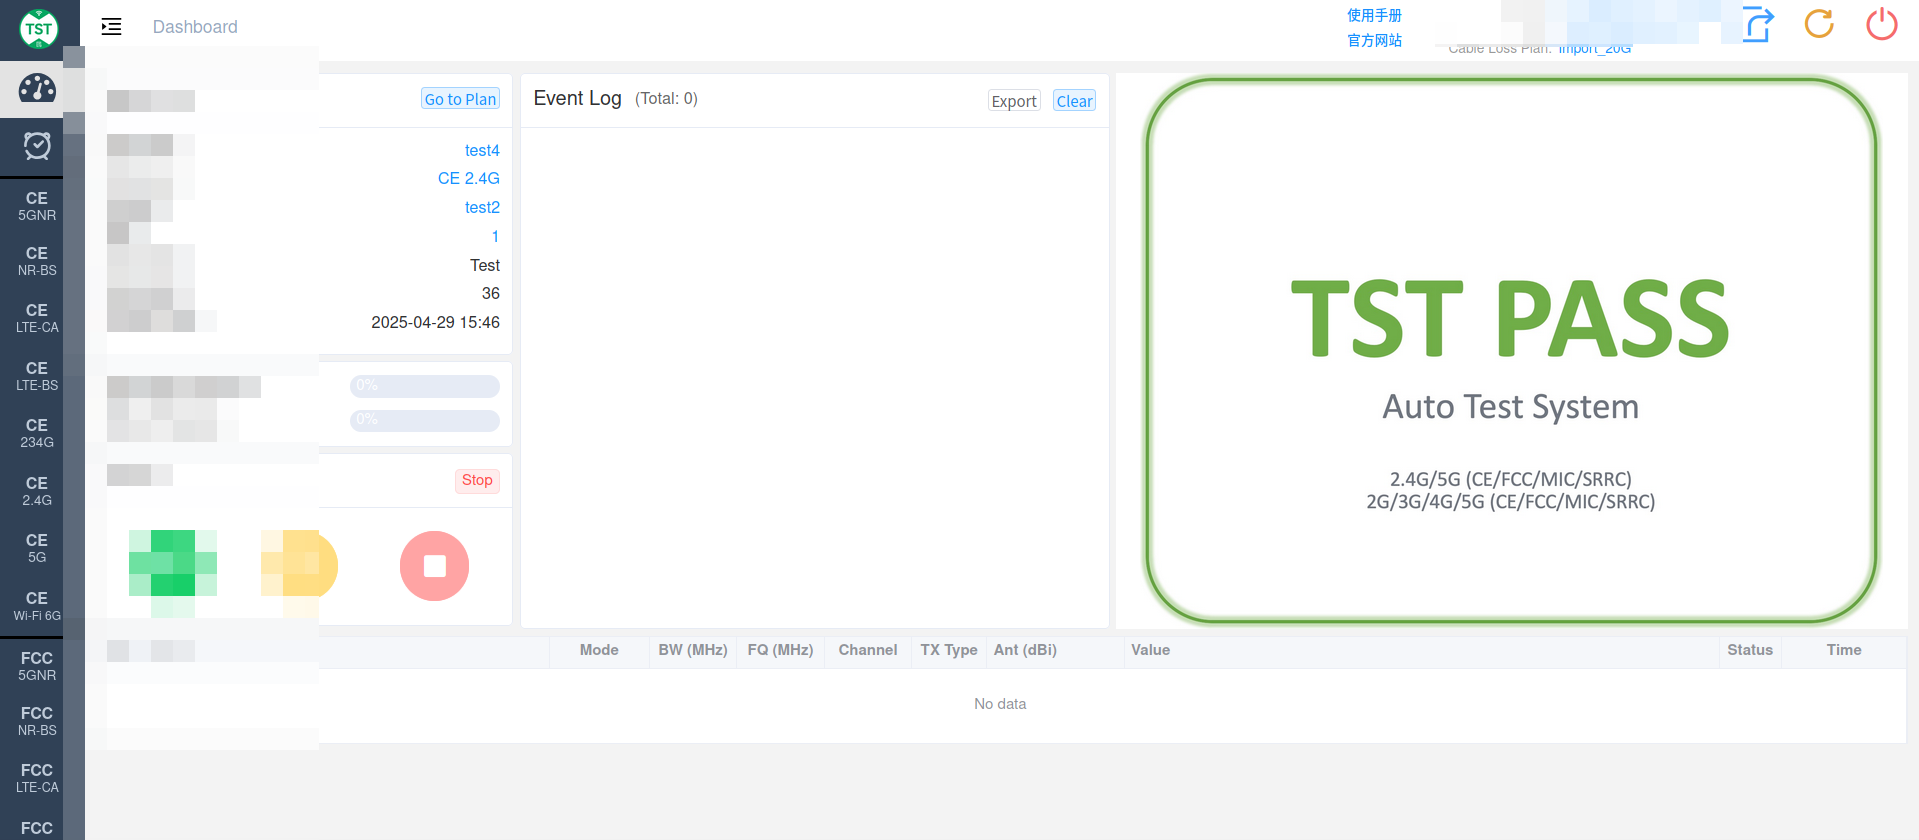
Note: Clicking the Run button as indicated in the figure will automatically jump to the main test page (as shown below). Click Start to begin the schedule test; the system will automatically test according to the set plan order.
Schedule Editing
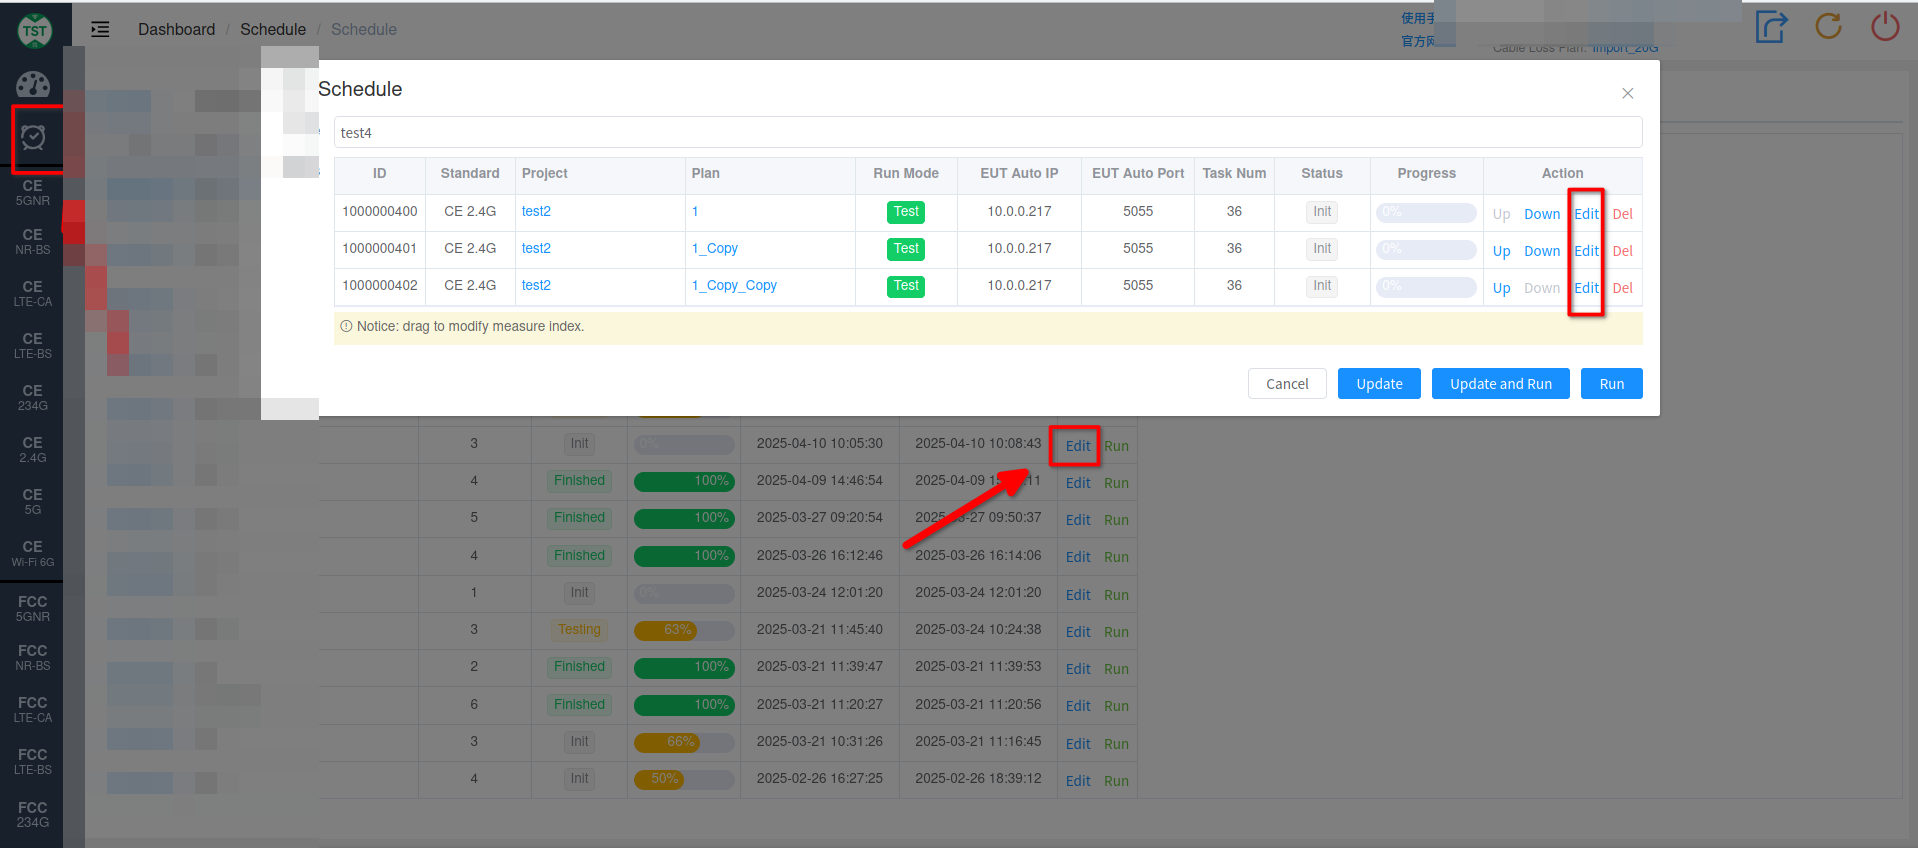
After adding the plan to the queue according to the content in Plan Settings, you can manage the queue settings in the Schedule dashboard.
Edit: Edit the queue or plan
Up / Down: Move the plan's position; you can also drag and drop directly with the mouse.
Del: Delete a plan within the queue
Update: Update the edited queue
Note:
In queue testing, the queue can automatically test multiple samples according to the plan set order. Just set the corresponding EUT Auto, no manual switching is required. For details, please see Automatic Fixed-Frequency Multi-Sample Support